
Prerequisites:
AWS source account & a target account
AWS Management Console access
AWS IAM (Identity and Access Management)
AWS CLI (Command Line Interface)
AWS Lambda
EC2 Instance (for AWS CLI setup and execution)
Putty (or other SSH client for EC2 instance access)
Linux command-line tools (e.g., wget)
Basic understanding of AWS services and their configurations
Step-by-Step Guide:
Create a lambda function in the source account.
1. Navigate to Lambda:
In the AWS Management Console, open the Lambda service by clicking on “Services” and then selecting “Lambda” under the “Compute” section.
2. Create a Function:
In the Lambda Console. Click on the “Create function” button.
3. Configure Function:
Choose “Author from scratch.”
Enter a name for your function. “Migration”
Choose a runtime (e.g., Node.js, Python, Java, etc). “Node.js 20.x”
Set the role. You can “create a new role with basic Lambda permissions” .
Other setting by default
Click on “Create function.”
4. Add Code: (Optional)
In the “Function code” section, you can either write code inline or upload a .zip file containing your function code.
Enter the handler function (e.g., `index.handler` for Node.js).
Click on “Deploy” to save your changes.
Create IAM user in source account and target account:
To create an IAM user with permissions `AdministratorAccess` and `AWSLambdaExecute` in the AWS Management Console and then generate an access key and secret access key, follow these steps:
1: Sign in to the AWS Management Console
Go to the [AWS Management Console](https://aws.amazon.com/console/).
Sign in with your AWS account credentials.
2: Navigate to IAM
In the AWS Management Console, open the IAM console by selecting “Services” and then clicking on “IAM” under the “Security, Identity, & Compliance” section.
3: Create a User
In the IAM console, click on “Users” in the left navigation pane.
Click on the “Create user” button.
Enter a username for the new user. “Source_User”
Choose “Provide user access to the AWS Management Console – optional”
Choose “I want to create an IAM user”
Other setting by default
Click “Next: Permissions.”
4: Attach a Policy
In the “Set permissions” step.
Click “Attach policies directly” in the Permissions options.
5: Add Permissions
In the “Permissions policies” Click the permissions `AdministratorAccess` and `AWSLambdaExecute`
Click “Next: Tags” (optional).
6: Add Tags (Optional)
Add tags to your user if you want to organise and categorise your IAM users.
7: Review
Review your choices.
Click “Create user.”
After creating the user, you’ll see a confirmation page. You can now view and download the user’s access key and secret access key. Make sure to copy and securely store these credentials, as they will be needed for programmatic access.
8: Access Key and Secret Access Key
In the User dashboard. Click “Source_User”
In the Summary Section. Click “create access key”
In the use case section. Click “Command Line Interface (CLI)”
Click “I understand the above recommendation and want to proceed to create an access key.”
Click “Next”
Add Tags (Optional)
Click “Create access key”
Create IAM Role in the Target Account:
Here is a step-by-step guide to creating an IAM role with policies in AWS using both the AWS Management Console and the AWS CLI:
1. Create a Role:
In the left navigation pane, click on “Roles.”
Click the “Create role” button.
2. Select Type of Trusted Entity:
Choose the trusted entity type (e.g., AWS service, another AWS account, or SSO).”AWS service”
Select the Service or use case “Lambda” that will assume the role.
Click “Next: Permissions.”
3. Attach Permissions Policies:
Search and select policies to attach to the role.
“AdministratorAccess”,”AWSLambdaExecute”
Click “Next: Tags” to add tags (optional).
4. Add Tags (Optional):
Add tags to your role for organizational purposes.
Click “Next: Review.”
5. Review and Create:
Enter a name for your role.
Review the configuration.
Click “Create role.”
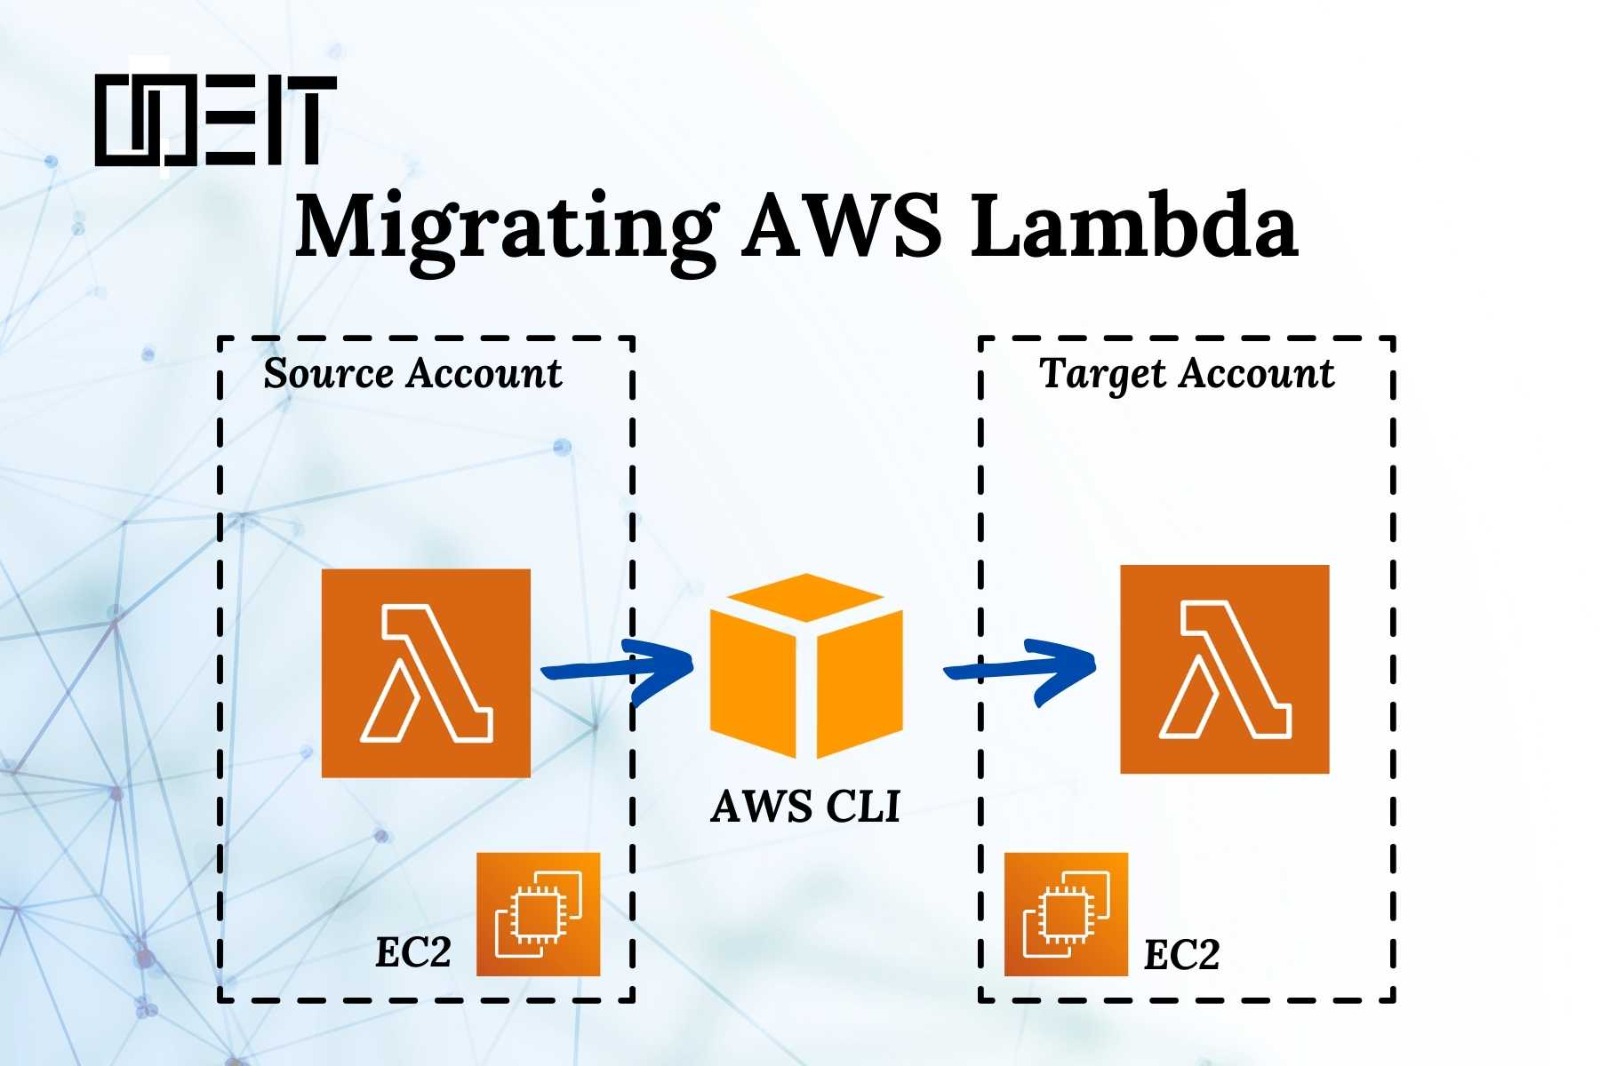
Create EC2 instance in your Source/Target Account:
After accessing the EC2 instance through Putty or GUI. Check if the aws CLI is installed or not through the aws –v command. If the aws cli is not installed, proceed to run this command.
Configure the AWS CLI Source Account:
Configure AWS CLI
Using the command
You’ll be prompted to enter the following information:
Run the GetFunction command to download the lambda function deployment package:
Run the following GetFunction command:
Important: Replace “my-function” with the name of the function that you want to migrate.
In the command response, open the URL link after “Location”. The link appears in a code block similar to the following example:
Note: The link after “Location”: downloads the deployment package.
Command for Download AWS Lambda function in Linux
Configure the AWS CLI for the Target Account or region:
Run the following Configure command:
Important: Change profilename to a recognizable name for your second AWS account following input values to pass the AWS Identity and Access Management or Region.
Enter the end (IAM) user credentials of the second AWS account and the Region:
AWS Access Key ID [None]: Enter the access key of an IAM user in the second AWS account. Or, if you’re migrating the function to another Region, then enter the access key of an IAM user in your first AWS account.
AWS Secret Access Key [None]: Enter the secret access key of the same IAM user.
Default region name [None]: Enter the AWS Region that you’re migrating your function to.
Run the CreateFunction command to create a new function in the
second AWS account or Region:
Note: You need the Lambda function deployment package and execution role to run the CreateFunction command.
Run the following CreateFunction command with the AWS CLI profile that you configured:
Note: In this command, replace the following values with the information from the function that you want to migrate:
For function-name, enter the name of your function.
For runtime, enter the runtime of your function.
For zip-file, enter the file path of your function’s deployment package.
For the handler, enter the handler name of your function.
For role, enter the Lambda execution role ARN that’s in the AWS target account that you want to migrate your function to.
For profile, enter the AWS CLI profile name you created when you ran the Configure command.
If you want to migrate a function to another Region but keep it in the same account, then you can keep the execution role.
To confirm that the migration worked, run the following list-functions command:
Note: Replace profilename with the AWS CLI profile name that you created when you ran the Configure command. Now Check your Target Account
Clean Up the Source Function (Optional)
In the source AWS account, navigate to the Lambda service.
Locate the original Lambda function you migrated.
Click on the function and select “Delete” from the “Actions” dropdown menu.
Confirm the deletion to remove the source function.